No, this has nothing whatsoever to do with family history, other than the fact that my grandparents grew sweet peas and I wanted to grow some too.
My reason for putting this on here is because I don’t have a gardening blog or a personal blog, and I wanted to share my photos for anyone else learning how to grow sweet peas so you can get your head around pinching out – what to do and why. I tried looking for photos like this online for myself, showing what to look for and what the end result is, and couldn’t find them. So I’m hoping someone who was in my shoes will find them useful!
Pinching out is recommended to make the plant bushier and it’ll grow more flowers. Exactly when you do it is up for debate. The packet of seeds I got from Thompson & Morgan – Heirloom Mixed – said to pinch out after two pairs of leaves have opened, and the Sweet Pea Society website (yes, there is one!) says the same. I watched some videos about how to pinch out and that advice was different – after three pairs or even four pairs have opened, but I decided in the end to go with the advice on the seed packet and I’ve been pinching out once the plants have got two opened pairs of leaves.
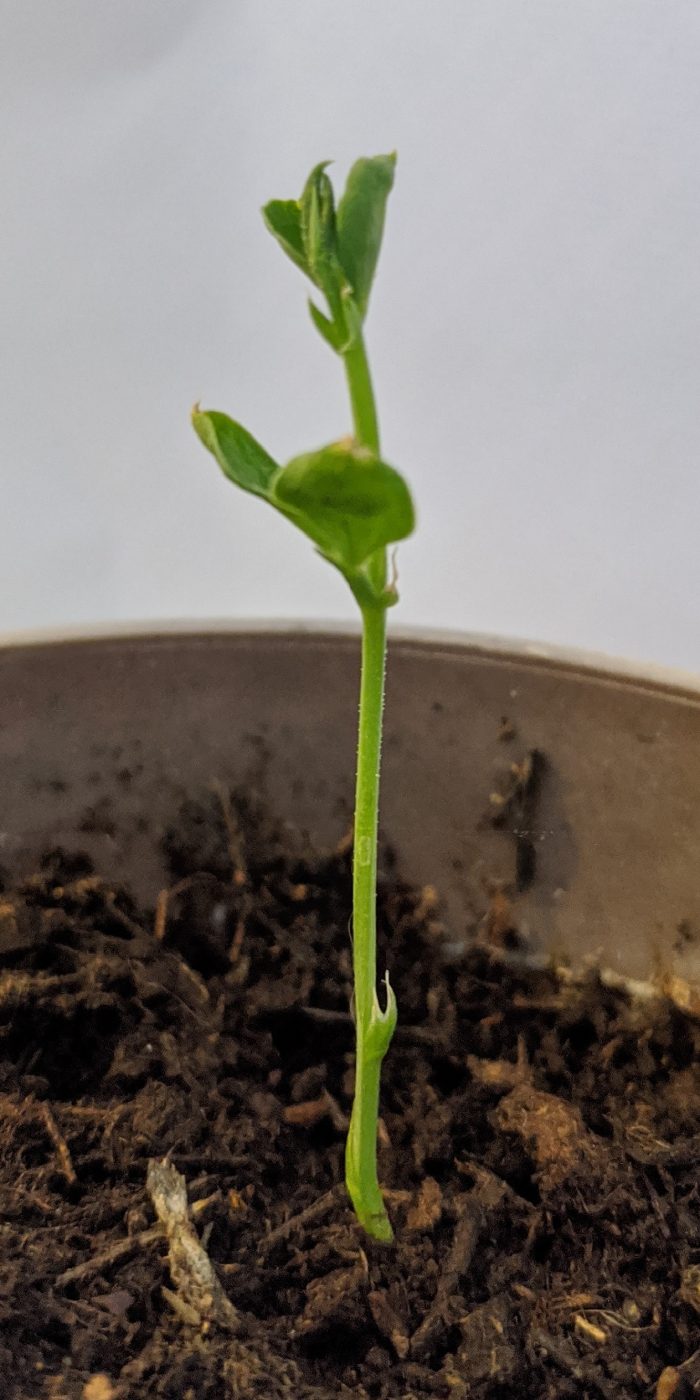
Picture 1: This sweet pea hasn’t been pinched out yet. It’s grown two pairs of leaves, and just where the top pair of leaves are, you’ll see a pointy bit. This is the growing tip. In a couple of days, once the tip has grown a little further from the top pair of leaves, I’ll pinch it out using the nails of my thumb and forefinger. It feels mean to hurt the plant, and it also seems rather risky – what if I kill it? But fear not, you are about to make the sweet pea very happy indeed!
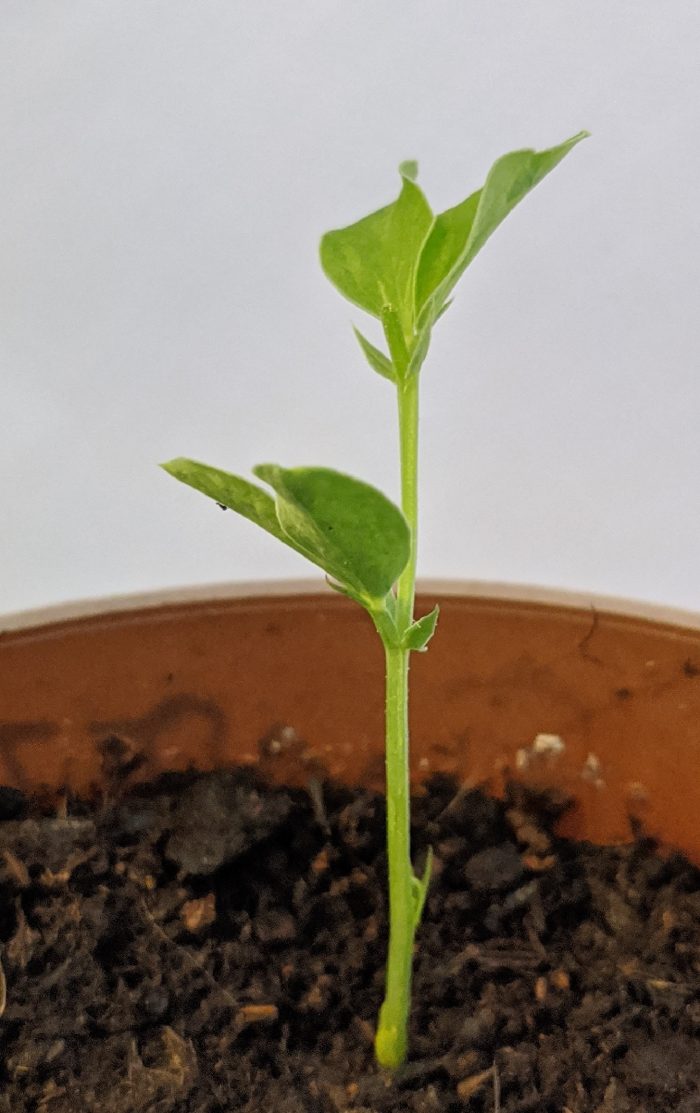
Picture 2: Look at the stem just above the top pair of leaves, and behold – no growing tip! It’s gone. The sweet pea is still rather spindly, like it was before the tip was taken off. It takes a couple of days for things to start happening, but they will…
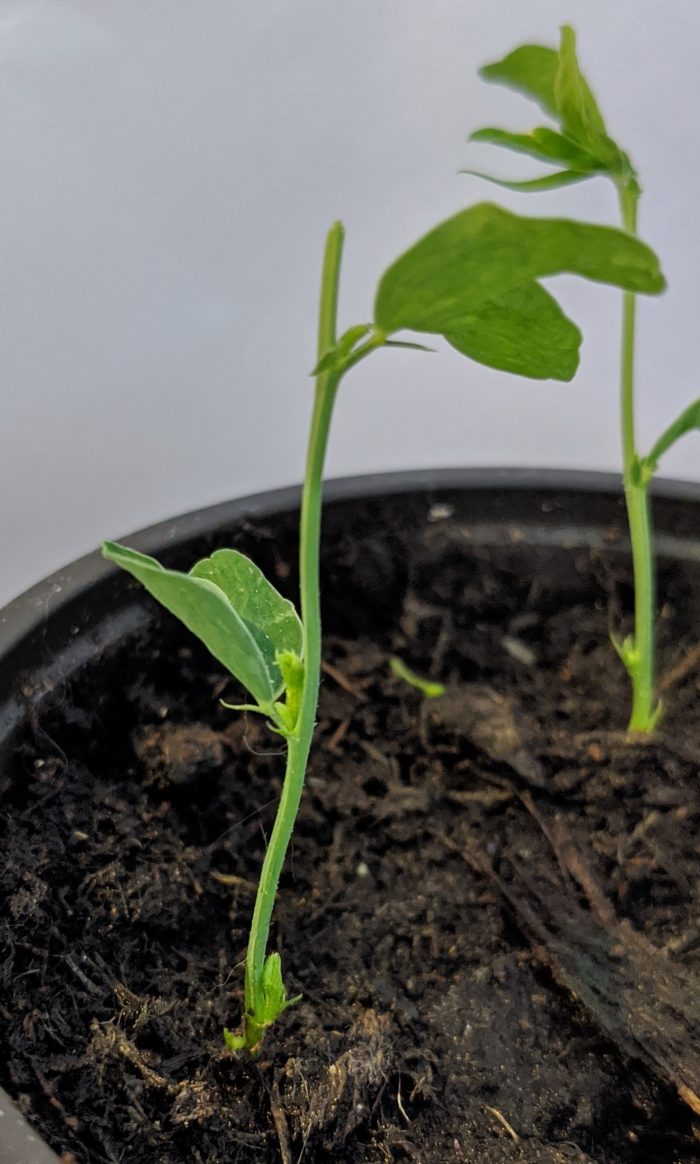
Picture 3: I pinched this one out a few days ago – probably not longer ago than a week at most. You can see three new shoots just starting – one down at the base, and one at each junction of the stem and the leaf pairs. What I’ve also noticed around this point is that the stem becomes thicker and there’s a dark line running up the middle of it – maybe it was there before but it’s certainly more noticeable.
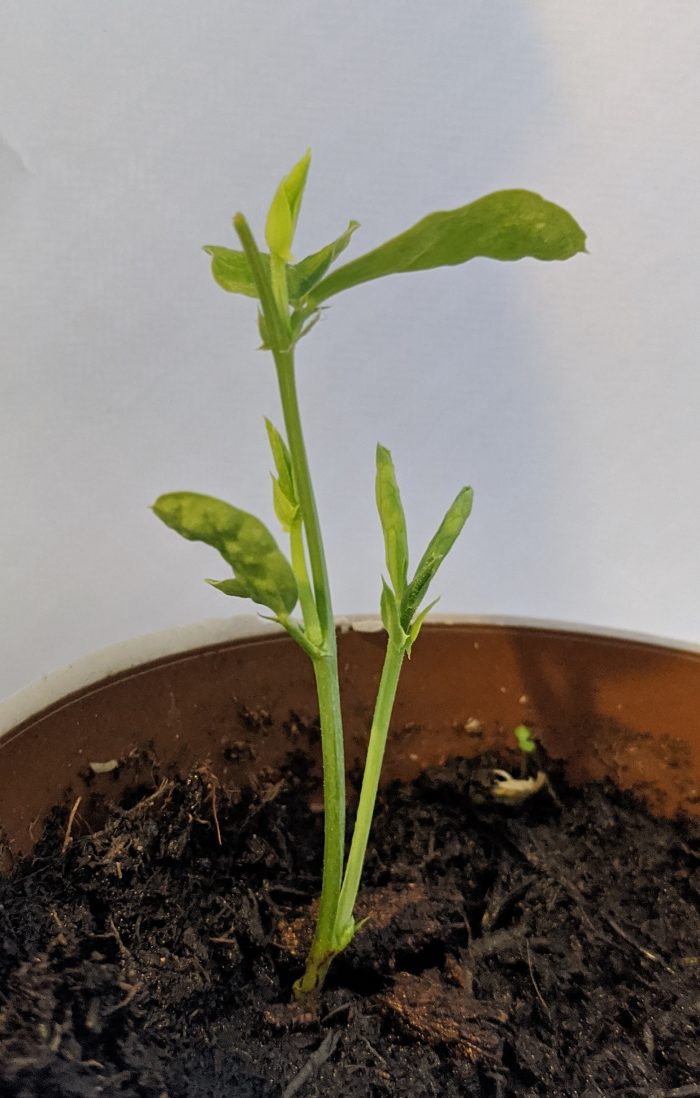
Picture 4: Ta-da! This was the first one that I pinched out, about two weeks ago. The stem is a lot thicker and just look at those side shoots! The one coming up from the base is already half the height of the original one, and the other two coming up from the leaf pairs are putting on a fine show.
I’m really looking forward to planting the sweet peas outside. I’ve got a pot with a cane wigwam all ready for them, and I’m putting into use a decorative metal screen which is perfect for climbing up.
The next bit of pinching involved will be taking off the tendrils and using sweet pea clips to help the plants climb. Taking off the tendrils gives the plant more ooomph for creating flowers and growing tall, or at least, so I’ve read. I wasn’t sure I’d want to do that, but having had success with pinching out the tip, I’m going to give it a try.
I got some geranium plugs from Thompson & Morgan too. They were so comically tiny, which of course they need to be in order to fit through a letterbox, that they looked like plants from a dolls’ house. A couple of them have just grown their first buds, and I’ve pinched them off too, again, on the advice that it will make the plants stronger. I would’ve been nervous of doing that it if hadn’t been for me learning from the sweet peas that it’s a really good thing to do for the benefit of the plant.